How To Create CD-ROM or DVD-ROM Disks (Unix)
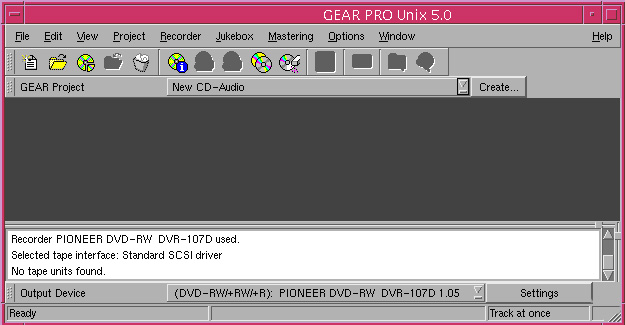
Creating CDs or DVDs with software or data files is easy with GEAR.
When creating CD-ROM discs, we recommend using the ISO file system. For DVD-ROM projects we recommend using ISO/UDF.
- Select "New CD-ROM (ISO)" or "New DVD-ROM (ISO/UDF)" on GEAR project panel.
- Click the "Create" button to the right of the panel. The "New GEAR project" window appears.
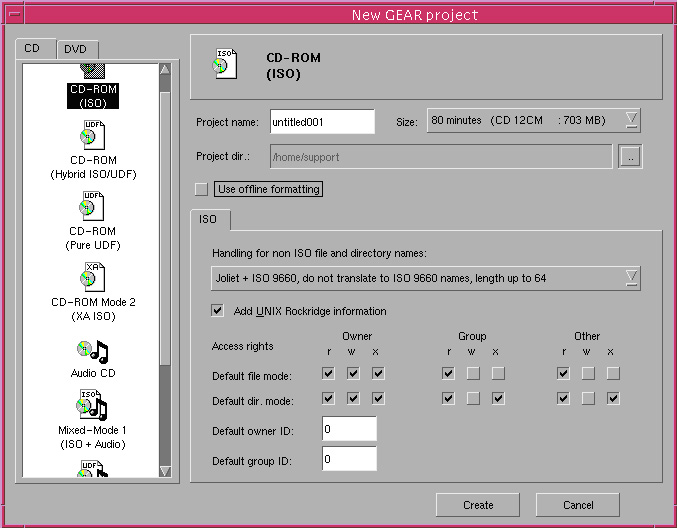
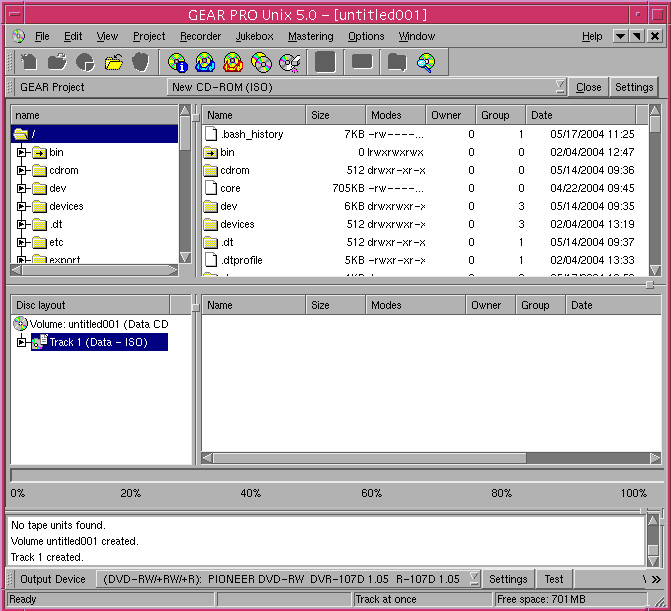
- Select the appropriate project size in the Disc Size panel. This should match your blank media capacity. Enter a name for the project. The Project name will become the volume label for the CD/DVD. Click "Create". The Explorer view of your computer will be displayed at the top half of your screen. The bottom half displays the view of the GEAR project (GEAR volume) you are about to create. The first branch in the tree view shows a data track. All of your software or data files will go into this track.
- You can now drag files and/or folders from the computer view into the empty track view (bottom-right window). Simply click on any folder in the top-left section in order to expand it to show its contents on the right. Double-click a folder to show any subdirectories. As you add files and folders to your project, the statistics such as date and start sectors will be displayed. In the bottom-right corner of the GEAR application window, GEAR will show the remaining space available. If the log view is enabled, you can monitor the actual copying. We recommend closing the log view if you are copying large amounts of data, this will speed up the overall operation (go to the "Window" menu, and deselect "Show Log"). If you select Settings next to the close button on the GEAR Project panel line, you can change the volume settings.
- Once you have completed the copying of all files onto the track, select a device to write the project to from the Output Device panel at the bottom of the window. Click Settings if you need to change any of the settings of the device (like write method, write speed, verify after write, etc). Click Test to only test-write the project to the CD/DVD recorder. GEAR will ask you if you want to write immediately after a successful test.
- Click Yes. GEAR starts testing and writing. If there are any problems, GEAR will notify you and give you the opportunity to solve the problem.
- Close the project by clicking on the Close button next to the GEAR Project panel. You're finished!
|